Home
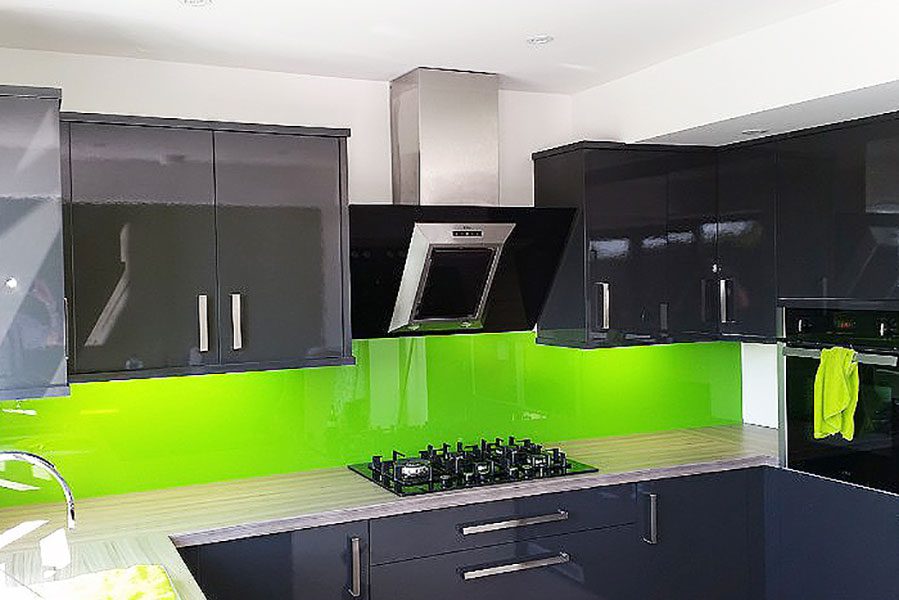
/ How To Replace Kitchen Splashback - Splashback Kitchen Toughened Glass ANY SIZE Sea Boat Lake ... : This heavy tone of glazed black challenges the idea of a sleek and transparent kitchen.
How To Replace Kitchen Splashback - Splashback Kitchen Toughened Glass ANY SIZE Sea Boat Lake ... : This heavy tone of glazed black challenges the idea of a sleek and transparent kitchen.
How To Replace Kitchen Splashback - Splashback Kitchen Toughened Glass ANY SIZE Sea Boat Lake ... : This heavy tone of glazed black challenges the idea of a sleek and transparent kitchen.. Remove as one piece, replace the board and tile away. How to install standard siz. Before cutting, you need to secure your splashback. Generally, installing a splashback will involve the following steps: The design possibilities are endless and this is a great opportunity to put your personal stamp on your new kitchen.
Remove excess silicone and then remove the tape. Along side the bonding adhesive you should also use either double sided mirror tape or specialist splashback fixing tape. Labour costs for electrical and plumbing and the cost of installing the cabinetry, splashback and appliances. How to get an estimate: Before applying any bonding to the rear of the splashback, clean the entire area with an isopropyl alcohol to remove all traces of dust and grease.
Acrylic Kitchen Splashbacks, Polymer Splashbacks - Akril from akril.com.au Installation costs are broken into two parts: This video has some good tips and tricks to make the j. Get your local builders' merchant to cut both the glass and plywood to those measurements. Some companies also install them for you; Cut your splashback to size and sand off the edges for a smooth finish. Carefully cut the wallpaper to fit the plywood. Place pieces of cardboard in between the splashback and the clamp to avoid any scratches or damage. Peel the plastic off the again of the splashback and apply silicone.
Stick your splashback to the wall using a silicone adhesive.
We look forward to seeing what other projects you have going on around your home and garden. This video has some good tips and tricks to make the j. Peel the plastic off the again of the splashback and apply silicone. How to get an estimate: Definitely remove tiles on side walls as tiling on tiles means you see two edges of tiles from sideways. Subway tile splashback by bespoke tile & stone author: However, this dark colour will slowly grow on you over time where you will have an appreciation of it. Remove as one piece, replace the board and tile away. Before applying any bonding to the rear of the splashback, clean the entire area with an isopropyl alcohol to remove all traces of dust and grease. The design possibilities are endless and this is a great opportunity to put your personal stamp on your new kitchen. Some companies also install them for you; To minimise the appearance of the overlap, using the blue masking tape mask the edges of both panels at the overlap. 01923 819 684how do i install a diy glass splashback.
Carefully cut the wallpaper to fit the plywood. Anne ellard whether you're installing a new kitchen splashback as part of a complete kitchen renovation or just replacing your existing one. Measure the space where you want your splashback to go and mark out it out on your piece of material. Beaumont tiles and kyal & kara from the block fans vs. Along side the bonding adhesive you should also use either double sided mirror tape or specialist splashback fixing tape.
Glass Splashbacks For Kitchens & Bathrooms | abc Glass from www.abcglassprocessing.co.uk Once your cabinets are ready, they will deliver your kitchen cabinetry to your place. A glass splashback is an easy way to improve the look of your kitchen. Generally, installing a splashback will involve the following steps: Subway tile splashback by bespoke tile & stone author: It would be easy enough to run a multi tool around the edges of the glass to cut the plasterboard, there should be 2 or 3mm gap around the perimeter sealed with silicone. There is no doubt that the kitchen splashback choice of the moment is one made from tiles. Use some tile packers on the bottom to pack the splashback up in case you want to change your benchtop later. Installation costs are broken into two parts:
Definitely remove tiles on side walls as tiling on tiles means you see two edges of tiles from sideways.
The design possibilities are endless and this is a great opportunity to put your personal stamp on your new kitchen. Before cutting, you need to secure your splashback. Once your cabinets are ready, they will deliver your kitchen cabinetry to your place. Before applying any bonding to the rear of the splashback, clean the entire area with an isopropyl alcohol to remove all traces of dust and grease. Use some tile packers on the bottom to pack the splashback up in case you want to change your benchtop later. Generally, installing a splashback will involve the following steps: Place pieces of cardboard in between the splashback and the clamp to avoid any scratches or damage. This video has some good tips and tricks to make the j. We look forward to seeing what other projects you have going on around your home and garden. Carefully measure the exact area where the kitchen backsplash will go. Anne ellard whether you're installing a new kitchen splashback as part of a complete kitchen renovation or just replacing your existing one. Cut your splashback to size and sand off the edges for a smooth finish. We use prices of between $1200 and $2000 to.
What a fantastic first post! Pressed metal splashback installation is one that you can do yourself. This heavy tone of glazed black challenges the idea of a sleek and transparent kitchen. If you change your mind on the colour later on, you can simply remove and replace the glass splashback with another one. So if you are after backsplash ideas that are going to smarten up your kitchen and perhaps even become a focal point of your space, there's a world of choice, and a ton of other kitchen ideas to choose from.
Best Kitchen Splashback Ideas to Redesign Your Cooking Area from innovativedecorideas.com No matter what type of kitchen splashback you desire, kitchen & stone will custom make your splashback to turn your dream and. Beaumont tiles and kyal & kara from the block fans vs. Carefully cut the wallpaper to fit the plywood. Tiles are relatively inexpensive, particularly when compared with other splashback alternatives. Faves show you how to diy tile a kitchen splashback. It would be easy enough to run a multi tool around the edges of the glass to cut the plasterboard, there should be 2 or 3mm gap around the perimeter sealed with silicone. Anne ellard whether you're installing a new kitchen splashback as part of a complete kitchen renovation or just replacing your existing one. Fitting splashbacks is simple regardless of whether yours is solid laminate or laminate.in this guide, we explain how to install yours by following these easy steps.
Use some tile packers on the bottom to pack the splashback up in case you want to change your benchtop later.
Beaumont tiles and kyal & kara from the block fans vs. Splashbacks protect your kitchen walls from all kinds of mess, and they look great. You want him to tile between your kitchen work top and the wall cabinets above, using 6 (150mm x 150mm) tiles, along one 8' (2400mm) wall, with two electrical sockets to take off, cut round and replace. Alternatively, you could stick a 4.5 mm cement sheet over the glass with a suitable adhesive and tile over that, it would bring your tiles out another 15mm or so which may create problems with your cooktop though. The kitchen backsplash is a fantastic space that. Place pieces of cardboard in between the splashback and the clamp to avoid any scratches or damage. Please feel free to create a discussion anytime you would like to share something with the community. Measure the space where you want your splashback to go and mark out it out on your piece of material. Our kitchen cost calculator estimates the cost of kitchens by adding installation costs to the cost of cabinetry, fittings and appliances. Before applying any bonding to the rear of the splashback, clean the entire area with an isopropyl alcohol to remove all traces of dust and grease. Along side the bonding adhesive you should also use either double sided mirror tape or specialist splashback fixing tape. This heavy tone of glazed black challenges the idea of a sleek and transparent kitchen. Generally, installing a splashback will involve the following steps: